WasteAway Installation Instructions
Basic WasteAway Has Many Installation Choices
The WasteAway is a receptacle that is used to deposit the waste into the sanitary sewer to be flushed away. The unit requires a 3”or 4" sewer connection and a hose connection with a vacuum breaker or use a bucket of water. If you use the hose connection make sure you have an anti siphon device that is screwed onto your hose bib before your hose to prevent any contaminated water from getting into your water system. This is a code requirement needed for a standard garden hose connection. The WasteAway can be installed in the ground or mount to the wall of your house, a fence or a post. The following instruction shows different installation options.
Any questions give us a call 208-576-6615
Before you install your WasteAway
- 1. Check the clean out locations and determine where you would like to mount the unit.
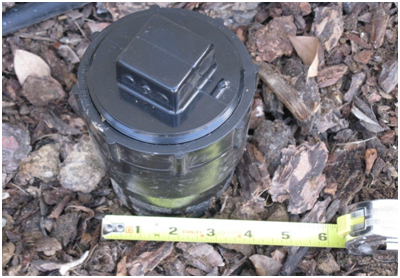
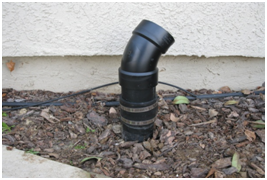
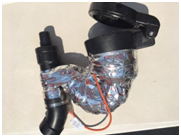
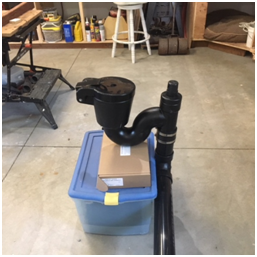
- 2. Determine the size of the clean out connection - the connection should be at least a 3” pipe. (See attached picture # 1)
- 3. Develop a material list to adapt the WasteAway sewer connection on the unit that is 4” off the wall connection with hose clamp to the typically female threaded clean out connection located in the ground or on the wall.
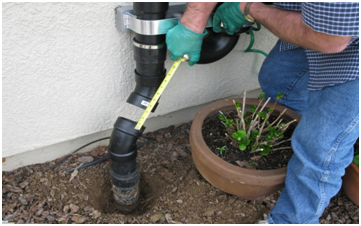
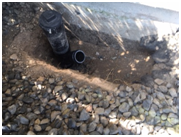
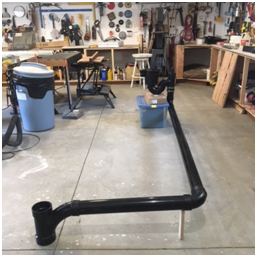
- 4. If you have a 3” female connection located in the ground that is more than 4” to the center of the cleanout away from the outside wall that you are mounting the WasteAway ( See attached picture #2 you will need to offset the 3” pipe coming off of the WasteAway to line up the hole in the ground. This is accomplished with 2 – 3” 45 elbows. (See attached picture #2)
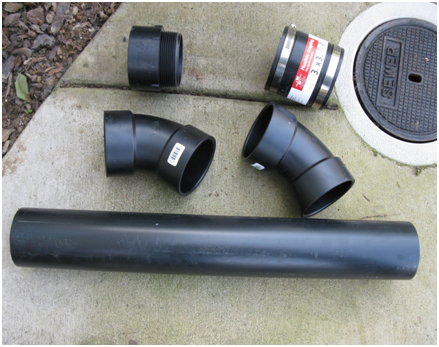
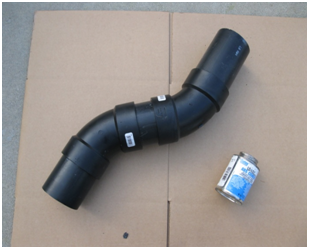
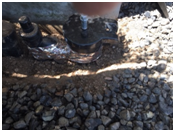
- 5. Locate the water source that is closest to the mounting location. Determine what you will need to bring the water to the WasteAway. Garden hose, hard piped new hose bib, or just a bucket of water. (See attached picture # 3) add these items to your list.

- 6. Analyze your installation and determine if you are up to the task of installation.
- 7. Most sewer and drain companies or landscapers can install your system if needed.
Ready to install
Option # 1 Mounting to the 3” cleanout on the outside wall of the house
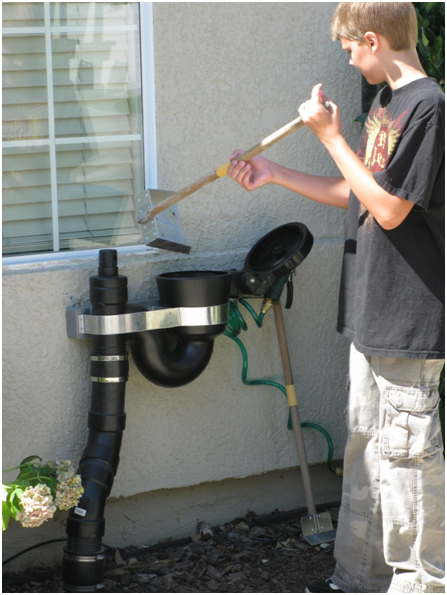
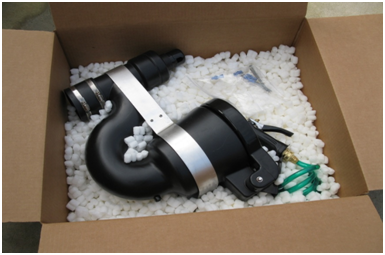
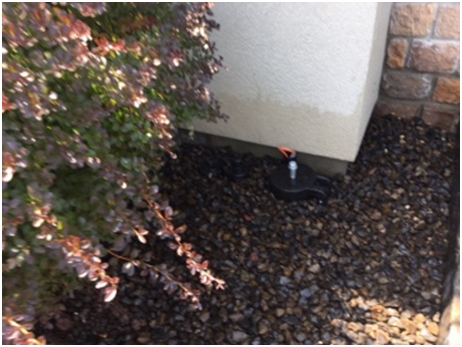
- 1. Unpack your new WasteAway and locate your mounting height and location. (Make sure you have the height to make the offset that you will need) put the WasteAway on the wall and make a small mark on the wall at the bottom of the mounting bracket after making the mark set the WasteAway aside for the moment. (See picture # 4)
- 2. Remove the 3” plug from your sewer clean out.
- 3. Install a 3” male adaptor into the female threaded fitting on the clean out.
- 4. Install a piece of 3” ABS pipe into the male adaptor long enough to get above ground level.
- 5. Install rubber coupling on 3” pipe.
- 6. Install short piece of 3” pipe with 45 elbow. (See picture #5)
- 8. Install short piece of 3” pipe with a 45 elbow into the rubber coupling on the WasteAway.
- 9. Put the WasteAway on the wall again have a helper hold it in place and align the two 45 elbows facing each other until they are aligned (you can put a short piece of 3” pipe into one of the elbows to help align the two fitting and make them straight) once they are aligned by turning each elbow in the rubber couplings and raising and lowering the WasteAway measure from inside the female sides of both 45s to determine the piece of pipe that will connect the two 45s. (See picture # 6)
- 10. Dry fit the pieces to determine the correct offset with the WasteAway bracket on the wall and level. If everything looks good remove the 3” pipe from the rubber WasteAway connection and the top 45 elbow. Leave the rest of the piping intact put the WasteAway on the wall set to the mark you made at the start of the installation. Measure from the inside of the rubber coupling on the WasteAway down to the inside of the top 45 this will be the final sewer pipe fitting. Dry fit all pipe fittings to be sure everything fits and the mounting bracket is at the height that you marked. Check for level and now mark the end of the mounting bracket to indicate the bracket mounting location. ( See picture # 7)

- 11. Remove the pipe and fittings for gluing. Start with the two 45s and the piece of 3” going into both rubber fittings. Glue the top piece of pipe into the top 45 elbow and the bottom piece of pipe into the bottom 45 elbow. Install the piece of pipe that goes between the two 45 elbows into the bottom 45. Now use a piece of cardboard on a flat surface to make the final glue connection. Glue the inside of the female side of the top 45 and the 3” pipe and connect the final pieces. Quickly lay the connected pieces on the cardboard so that the whole piece lays flat for good alignment. (The ABS glue dries very quickly do this connection very quickly if the 45s are not straight it will make your alignment off (See picture # 8 & 9)

- 12. Slide the end of the bottom pipe into the rubber connection at the clean out. Align the assembled fitting to the WasteAway connection and adjust the assembly so it looks straight and tighten the 4 hose clamps.
- 13. Take the 4” screws that came with the WasteAway and screw one at each side of mounting bracket using a level on top of the bracket to insure a level installation of bracket. If you are mounting on a stucco wall use the screws to make a mark on the stucco. Remove the WasteAway from the piping and set aside. Using a 3/8” masonry bit drill a hole at the marked spots that the screws need to penetrate. If you hit plywood or a stud stop drilling and reinstall the WasteAway screwing it to the wood backing. If the stucco does not have any backing install the blue stucco anchor included with the screws by driving the anchors into the stucco with a hammer until they are flush with the surface of the stucco. Reinstall the WasteAway and insert the 4” screws into the blue anchors. This will cause the anchor to expand in the stucco to hold the WasteAway.
- 14. Tighten the rubber couplings and adjust the fittings for a straight and level installation.
- 15. Attach the water connection to the flexible hose.
- 16. On the bottom of the mounting bracket there is a 3/8” one hole strap. Once you have the water connected insert the flexible hose into the one hole strap and tighten the screw to secure the hose so that the weight of the hose doesn’t open the lid on the WasteAway.
- 17. The installation is complete!
- 18. Turn on the water and fill the trap in the WasteAway by squeezing the spray nozzle about half way so that you are spraying with a fan pattern. This will allow the trap to fill instead of flushing the toilet by spraying full power.
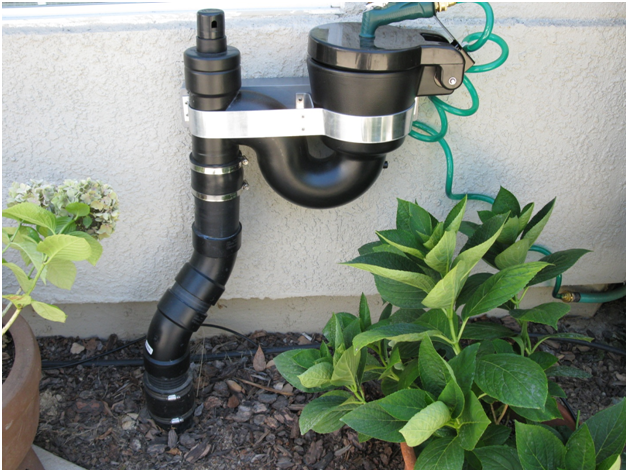
Completed Wall Mount WasteAway
Option # 2 Connecting to a sewer line under your house
(Crawl space or basement)
This may require professional help and a permit
- 1. Locate your bathroom with relation to your desired mounting location.
- 2. Access your crawl space or basement to locate your 3” or 4” sewer line under your bathroom.
- 3. Find the closest connecting point to connect the WasteAway sewer line.
- 4. Install the WasteAway on the wall as previously discussed in Option 1.
- 5. From under the house drill a ¼” hole in the outside wall close to where you want to mount the WasteAway where you have the full clearance around floor joist or studs to install a 3” pipe through the wall.
- 6. Locate your pilot hole on the outside of the house and confirm the mounting location.
- 7. Install a street 90 on the rubber connection on the WasteAway with the female end heading towards the house wall and outline the pipe at its entrance point to the crawlspace.
- 8. Cut a hole in the wall for pipe to enter crawlspace.
- 9. Establish your connection point in your existing sewer line by installing your sewer line with ¼” fall to the closest point of connection with available fittings.
- 10. Place your final fitting next to your connection point to establish where to cut your existing sewer line. You may want to make that connection with rubber couplings depending on how much flexibility you have in your existing sewer line to connect your new fitting. This can be accomplished by adding a short piece of pipe on one end of the last fitting and cutting out a larger section of existing sewer line. Slide the rubber coupling onto the pipe so that when you glue the other end of the fitting to the existing sewer line you can slide the rubber fitting between the short piece of pipe you inserted into the fitting and the existing sewer line.
Installation is complete
Option # 3 In Ground Installation Next to Cleanout
- 1. Locate your cleanout and determine the size of the pipe.
- 2. Determine the location of the WasteAway.
- 3. Dig around the cleanout to expose the depth to the main line.
- 4. Us a Y fitting on the riser as low as possible and a street 45 from the rubber fitting on the WasteAway.
- 5. Inset the male end of the 45 fitting into the rubber fitting on the WasteAway.
- 6. You want the WasteAway to be minimum of 2" above the finish elevation of the soil so holding the WasteAway at the finish elevation aim the street 45 fitting towards Y fitting on the riser.
- 7. Take a measurement between the 2 fittings adding the distance of the bells on both fittings.
- 8. Cut a piece of 3" ABS to the length between the two fittings. Dry it to be sure the WasteAway is at the right elevation. If it is glue it together.
Street 45 attached to WasteAway
A 4x4x3" Y installed on cleanout
WasteAway attached with Y & 45
- 9. Backfill the WasteAway and you are ready to go.
Completed WasteAway next to cleanout
Option # 4 In Ground installation Away From Cleanout
- 1. This installation is very similar to mounting next to the cleanout but instead of using 45's use a street 90 and a sanitary tee.
- 2. This gives you more space to achieve 1/4" fall per foot of run for your drain line.
- 3. Keep in mind that if you are above the frost line depth you may need to heat trace the piping along with the WasteAway.
You need 1/4" fall along this line
If you use a street 90 you will gain additional elevation
Protect from freezing.
- 1. As shown above we are using a 6' heat trace tape available at Home Depot or local hardware store. The outer coating is foil insulation. You will need a GFI outlet and pluggable thermostat.
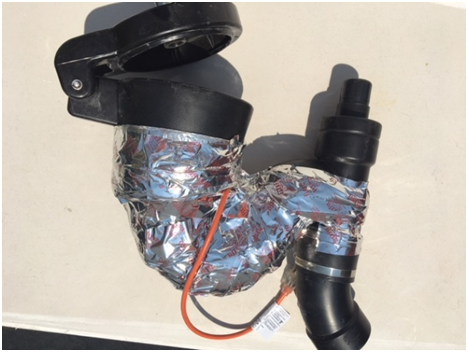
This is how it should look
The Future of Pet Waste Management
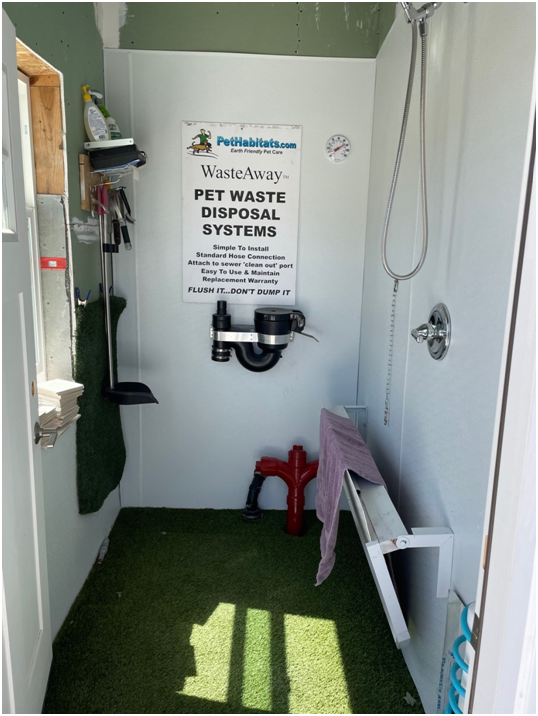
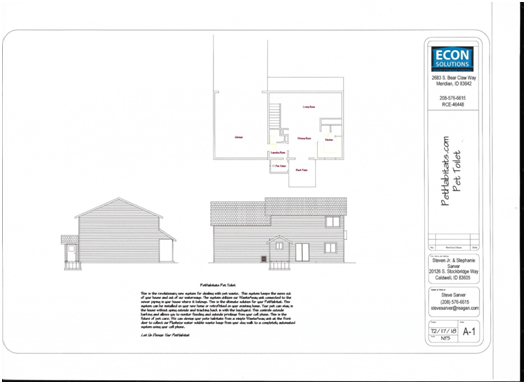
Pet Bathroom
This is the ultimate way to utilize the WasteAway in ground at the fire hydrant with bathing table

This installation Collects The Pee & The Poop
This installation uses the WasteAway as the toilet with a concrete base that is heated with a photo cell controlled light. We are using a plastic egg crate under our special DuPont K-9 grass that is designed for dog parks. Just point the dogs to the toilet with dog door very little training required. This unit can be designed into your new home or retrofitted to your existing home. We will be designing your pets habitat including video camera observation and communication with your pet while you are away from home . Controlled dog doors from your phone auto food and water.
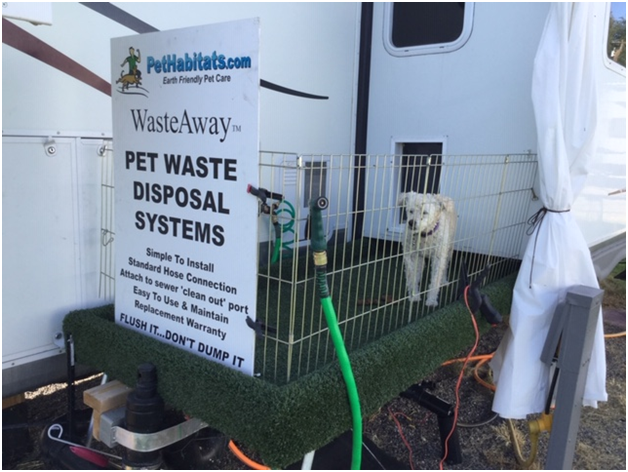
RV PET TOILET
No need to rush back to your pet to relieve themselves when they can't come with you. The curtain protects your neighbor from unsightly view and smell
Let Us Design Your PetHabitat
E-Con Solution LLC DBA PetHabitats
www.pethabitats.com
Please contact us at stevesr@pethabitats.com with any questions, inquires or comments
208-576-6615
How to use the WasteAway
- 2. Make sure the trap is full of water.
- 3. Pickup your pet’s deposits either with a Pooper Scooper or our FlushEze pet waste bags.
- 4. Open the lid and dump it into the receptacle.
- 5. The best way to flush the unit is with a bucket of water.
- 6. After flushing is complete close the lid and squeeze the nozzle about half way to cause a fan pattern. This will allow the trap to fill.
- 7. Sometimes especially when the poop is dried out from the sun it may be difficult to flush. Close lid and allow soaking for a short time and flush again.